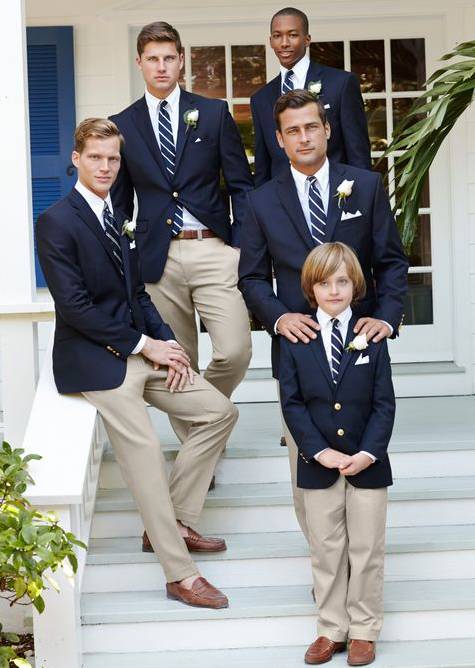
Dear gentlemen, how to choose your tie and how to knot it, depending on your height, the colour of your suit, the occasion, the size of your collar and neck, etc? In this article, you would find 4 of the 180 world’s knots tie. Take a tie and try!
Length, width and upper button
Length: You must keep in mind that the largest tip should finish just above your belt.
Width: The thinner you are the thinner your tie should be. No more than 7.5cm if you are slim, up to 9.5cm if you are more strongly built. The thinnest tip has to be 2cm less than the other one.
Upper button: you close it and you hide it with the tie. Wearing a tie with the open upper button is fashionable in America, but it only could be appropriate for casual occasions.
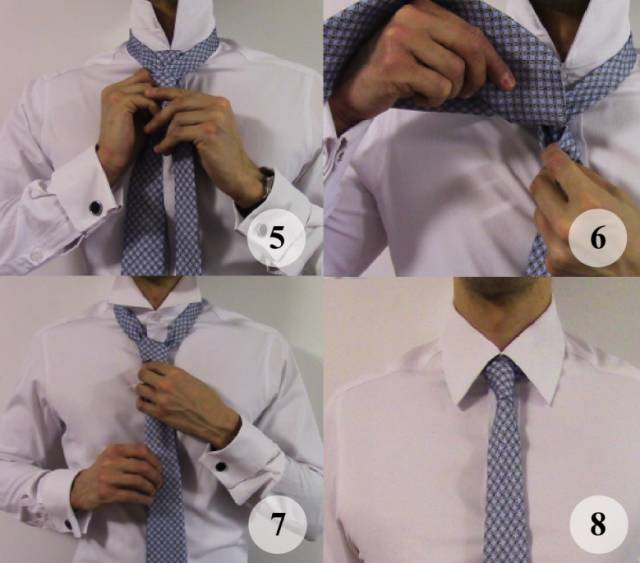
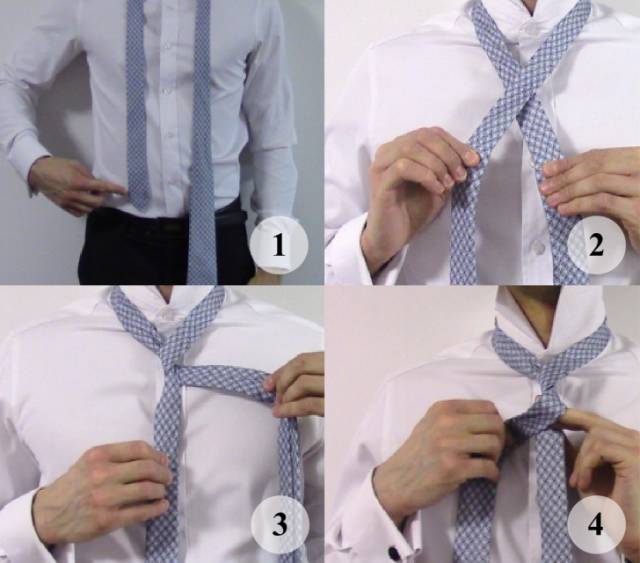
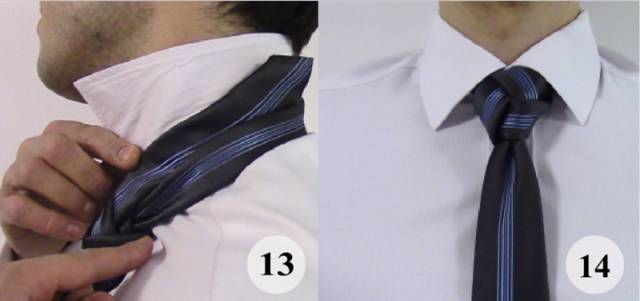
The “four in hand” knot
What is it? The Four-in-Hand is one of the most popular of necktie knots. Slandered and tapered, it remains relatively simple to do, while giving a beautiful effect.

How to wear it? It works best with medium to wide neckties made from heavy fabrics as there are not too many wraps to do. While this tie knot can be worn by anyone, it looks especially well on men with shorter necks to lengthen the look.
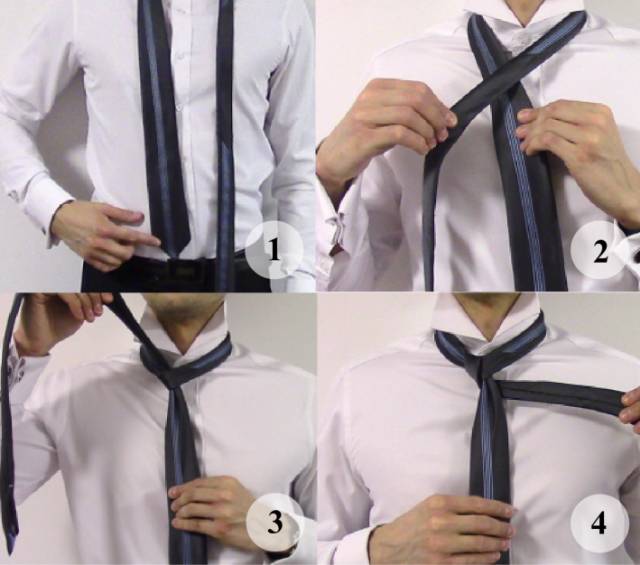
How to do it?
Step 1 & 2. The narrow end is on your right, a few cm above your belt. Cross the wide end over the narrow one.

Step 3 & 4. Wrap the narrow part with the wide one.
Step 5. Pull the wide part through the loop created by the tie and your neck.
Step 6 & 7. Now you just have to bring the wide part down through the front loop of the knot you created. At last, adjust it.
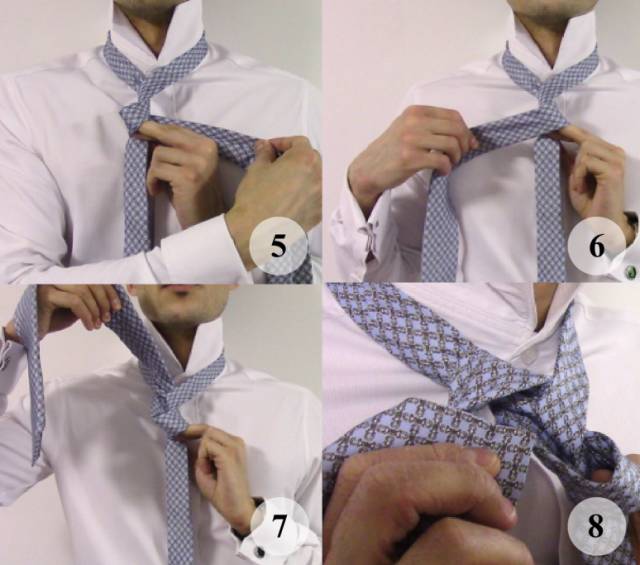
The Windsor knot
What is it? From the English Duke of Windsor, this knot suits perfectly formal occasions. It is voluminous and better on spaced collar, like Italian collar or Windsor collar.

How to wear it? Very sophisticated, pay attention to center it precisely in the middle of the collar, and to hide the upper button. Appropriate for a job interview or formal business occasions. Beware, it is too large for a super slim suiting.
How to do it?
Step 1 & 2: The narrow end is on your right, a few cm above your belt. Cross the wide end over the narrow one.

Step 3: Pass the wide end of the tie under the loop between your neck and the tie.
Step 4: Loop the wide end of the tie under the narrow end on the left side. Pull this tight as well. You will now have a loop on either side which begins to look like a triangle.
Step 5 & 6: Bring the wide end of the tie up and make a loop in order to create the second side of the triangle.
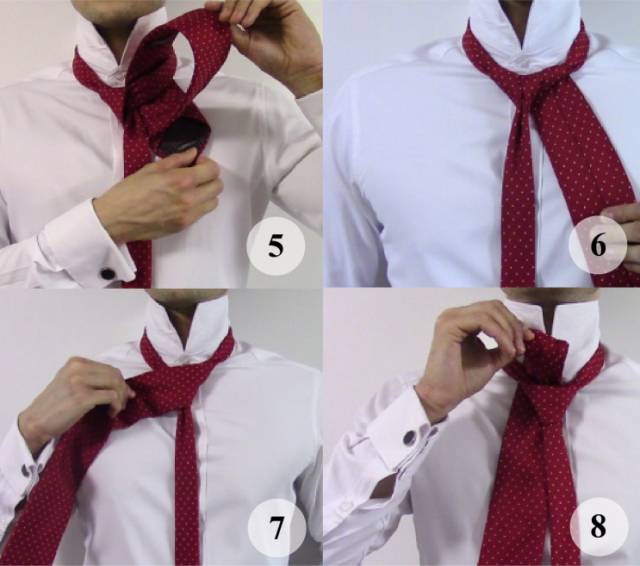
Step 7: cover the triangle you just done putting the wide end on your right, it will come in front of the knot.
Step 8: Continue by bringing the wide end of the tie between the necktie and the collar line.
Step 9 &10: Insert it through the loop that you just formed. Tighten the knot gently by pulling on the wide end, create a V shape on the knot with your fingers.
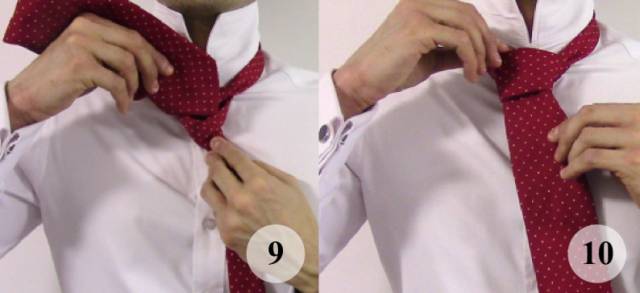
The “Prince Albert” knot
What is it? This uniquely elegant knot is easily identifiable by any tie addict. Slightly asymmetrical, it has a little more bulk than the Four-in-Hand but should be pulled tight to give it a slender & polished look.

How to wear it? What makes it stand out are the 2 wrappings that are visible towards the lower part of the knot. Whether you wear ties daily, or just for special occasions, I suggest you try this knot. This knot is more adapted for tall men, indeed, being a long and thin knot it helps to lengthen your silhouette.
How to do it?
Step1 & 2. The narrow end is on your right, a few cm above your belt. Cross the wide end over the narrow one.
Step1 & 2. The narrow end is on your right, a few cm above your belt. Cross the wide end over the narrow one.
Step 3. Under the small end and to your left
Step 4. Across the front and to your right. You can place your fingers in the loop, it will be easiest for you to proceed to the step 8.
Step 5. Under the small end and to your left
Step 6. Across the front and to your right. You did 2 loops with the wide end.
Step 7. Up into the neck loop from underneath.
Step 8 & 8 Bis. Down through both loops in the front. You can catch the end with the fingers you already have in the loops.
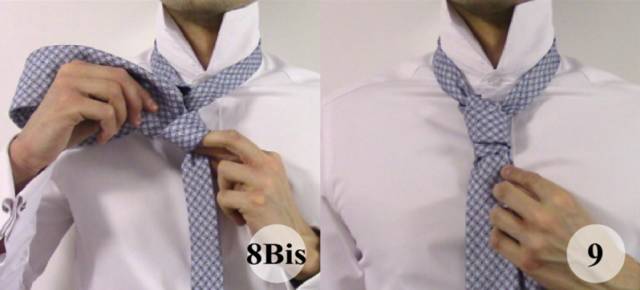
Step 9. Tighten the knot by pulling down on the wide end. Slide the knot up & adjust. The first loop should show slightly underneath the second loop.
The trinity knot
What is it? With its rounded shape like a trinity symbol and slightly larger than the Windsor, this knot is elegantly remarkable.
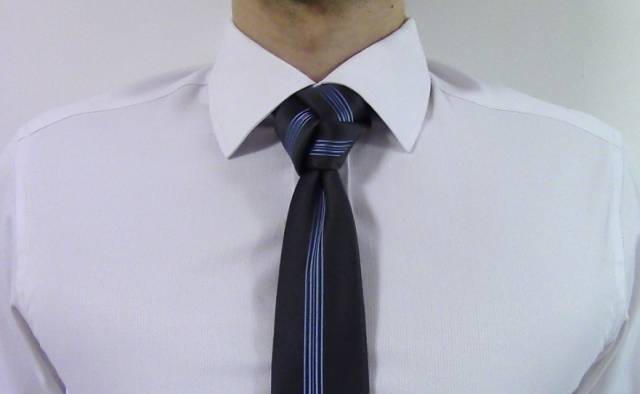
How to wear it? Beware, it would be too much for formal business occasion, wear it for social events only, on spread collars. You should also avoid busy patterns, rather select a plain tie or with one single line, without too much thickness.
How to do it?
Step 1. You should wedge the tip of the wide end at the top of your belt buckle. There is only one the small end to move.
Step 2. Over the wide end to your right
Step 3. Up into the neck loop from under.
Step 4. Down to the left, passing under the knot.
Step 5. Pass the end toward the neck loop on your left side. You will see the same triangle as the Windsor knot.
Step 6. Cover the center with the end, now the end is to the right.

Step 7. Up through the neck loop on the right side.
Step 8. Pass down the end into the front loop you just created. Maintain it lose.
Step 9. The samll end gets under the wide end to the right.

Step 10 & 11. Put the small end into the loop you made on the bottom of the knot.
Step 12 & 13. Constrict and insert the rest of the small end behind the neck loop on the left side.
Gentlemen, I hope our tutorials helped you to understand how to knot your tie, let us know if you made progress in knotting ties until our next article, where you will find other knots and more specific information about tie and occasions.